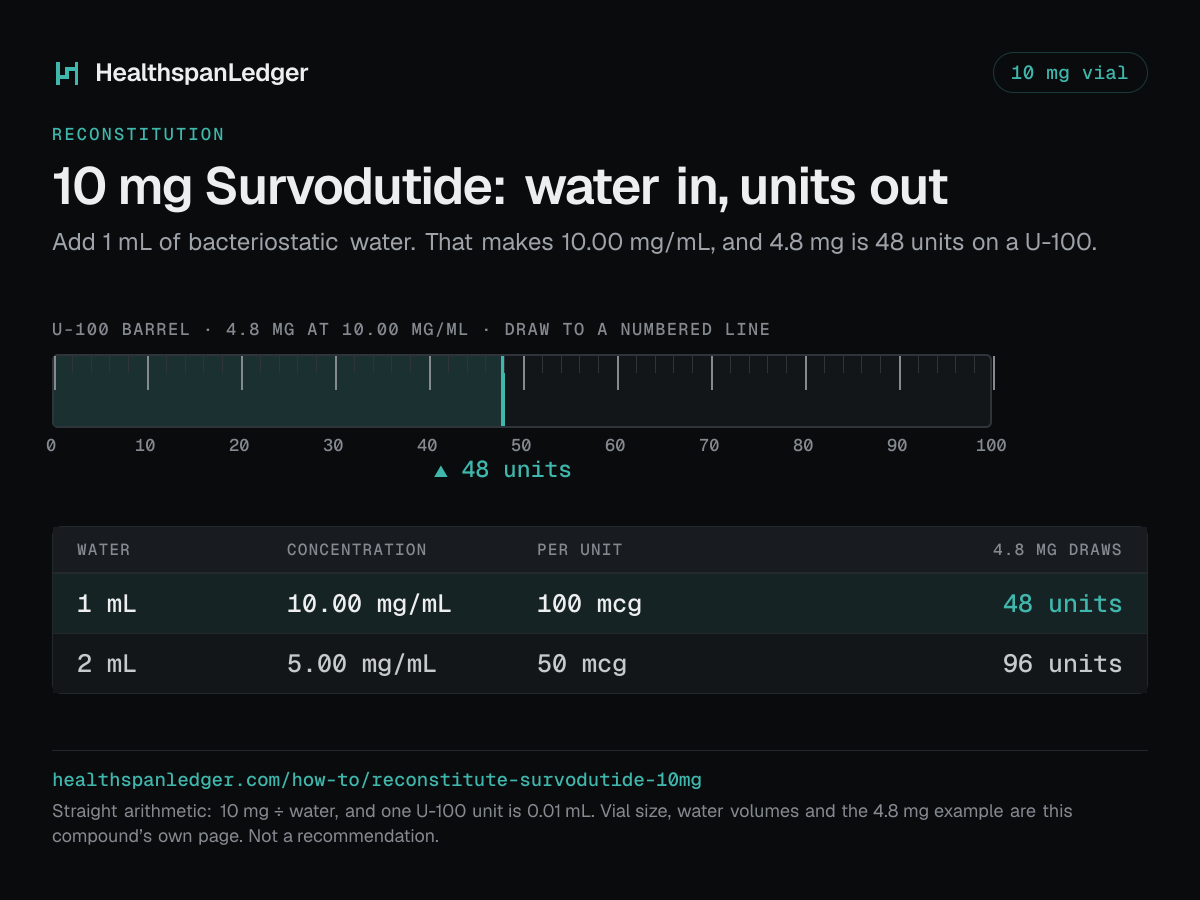
Both rows in the table are usable
On the smaller vial one of the two listed volumes cannot be drawn at all. Here both can, because the stronger solution keeps the dose inside one barrel.
Fitting the barrel does not establish that the product is safer or that this vial is a better purchase. It only answers whether the calculated liquid volume falls within the displayed scale.
Two complete doses at this worked amount
The vial content divided by the example amount gives two complete doses before handling losses. Changing the entered amount changes that count. It is not a statement of how many appointments a purchased product will cover.
No product storage limit is assigned here, so the portion count does not establish how long it can be used.
At lower trial amounts, the same drug content divides into more theoretical portions. The count below applies only to the worked amount.
A draw that fills most of the barrel
At the larger listed volume the plunger travels most of the way up the illustrated syringe for one dose. The reading fits the scale, but a higher entered amount could reach or exceed its limit.
The capacity flag helps identify that change before a result is mistaken for a usable instruction. Check the actual syringe capacity rather than assuming every device marked U-100 holds the same total volume.